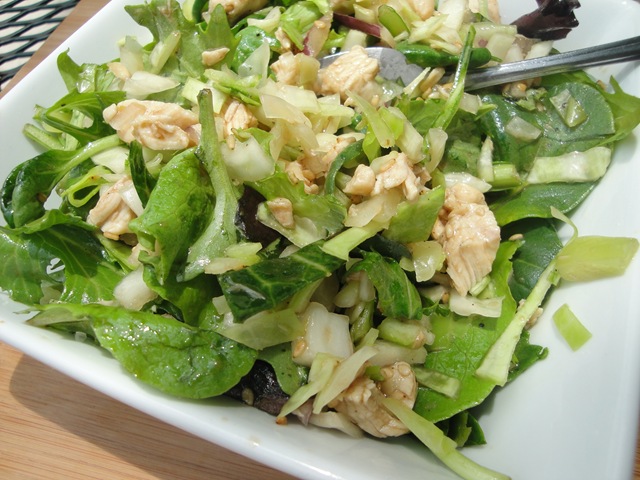
Chinese chicken salad over mixed greens

DSC02708


You are in for a treat today!!  I’m not bragging…I’m really not, but this is seriously Good Eats!  One of my closest friends served this to me a few years ago.  Well it feels like a few years ago, but really our middle daughters were just babies at the time…so I guess it’s been closer to 7 years ago…time sure does fly.  And at the time, we never thought we’d be adding to our respective families down the road…funny that we now each have a third child, and they are already toddlers moving fast into preschool age!

I’ve made this recipe several times without changing it up much, which is surprising for me.  I usually tweak the dressing a bit to my taste and switch out the sugar and add honey instead, but overall it’s pretty much stayed the same.  But always in the back of my mind I knew I wanted to find a way to cut out the use of one of the main ingredients.  It’s processed…chicken flavored ramen noodles…and for some reason substituting that just seemed to stump me.  I still haven’t figured out how to switch out the noodles…so if you have any ideas let me know.  I’d want an option without white flour which makes it a bit harder.  But I think I managed to get the flavoring from the seasoning packet down by using chicken bullion instead…they have healthier choices in the type you can buy.  What else would work?  Any ideas?

Though I love it…for some reason (the cabbage) no one in my family eats it but me.  They really are missing out!!  And since it makes such a large bowl, near the end I started mixing it in with mixed greens.  Wow..was that ever a great idea! 

Chinese Chicken Salad

1 head cabbage, finely chopped
2 chicken breasts, finely chopped (cooked in olive oil with salt & pepper)
8 scallions sliced (I used a combination of red onion and Vidalia onion this time)
1/4 cup toasted sesame seeds (original called for 1/2 cup)
*optional 1/2 cup slivered, toasted almonds (I didn’t have on hand, so I left out)

Mix everything in a bowl, and add about 3/4 of the prepared dressing (recipe below).  Mix well.  Add more dressing to taste, and keep remaining dressing on hand to add if you eat it with mixed greens.

Dressing

1/2 cup safflower oil
1/8 cup good quality extra virgin olive oil (or regular olive oil)
1/4 cup rice vinegar
1/8 cup good quality Modena balsamic vinegar
1/4 cup filtered water
1/2 cup honey
3 tsp chicken base or bullion
1/4 tsp sea salt
1/4 tsp pepper

Place all ingredients in a mason jar, screw lid on tightly and shake well to mix.  Place in fridge while making the rest of the salad.

This is a relatively quick meal to throw together…especially if you already have cooked chicken breast on hand. It’s very easy to chop up a head of cabbage quickly, and the dressing is a cinch to make.  I really like eating this for lunch throughout the week, and it’s also a great meal to serve your girlfriends while the kids play and eat their pb and j’s.  As with most of these types of salads, it tastes better the next day.  But by the third day I needed to perk it up a bit with the mixed greens.  Do you have any summer salads to share?  Or any similar to this one?  I’d love to hear!

**Don’t forget to use the “share” buttons below to share this recipe with your friends! There’s an easy button to share on Facebook. THANKS!! It makes my day. 🙂

This recipe linked up to Fabulous Food Friday.

22 Comments

Annie’s Organic Buying Club so…excited!!

 
Last week I finally joined Annie’s Organic Buying Club.  I had heard about it last August and though it definitely looked like a great deal for organic produce, I wanted to wait and re-work my food budget to include it.  Before I knew it….the holidays were upon us, and then we’ve had quite a bit of weekend travel as well as our big vacation.  I knew I’d join at some point, but it’s really something you have to  be prepped up and ready for.  When you have all those fresh veggies coming into the house…you need to have a plan, and I certainly didn’t want any of that precious produce going to waste!

At some point my mom joined up, and then a very good friend of mine.  I was excited to learn that there is a pick up spot right in MY neighborhood!!  Really…it couldn’t get any easier than that, could it?  And now I got to see the bounty in person…WOW…I couldn’t wait to have my turn!  I was so excited to pick up my share this past Tuesday.

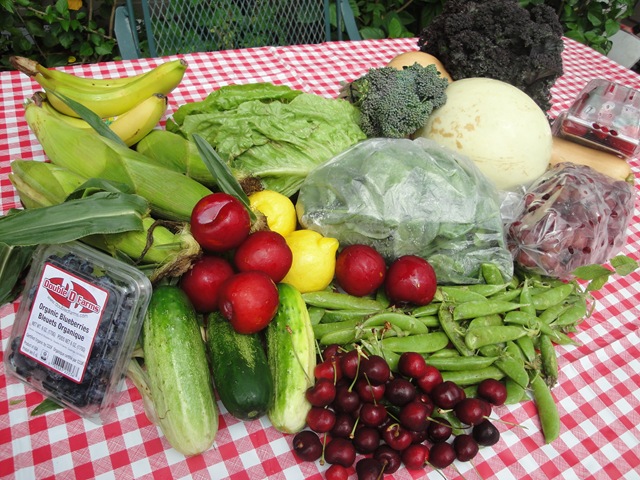
Just look at all the gorgeous ORGANIC produce I got for only $45
DSC03202
I got 16 different types of produce: 8 vegetables and 8 fruit, and 34 actual items (counting the sugar snaps, cherries, berries, and grapes as 1 item each).  Can you see how large that butternut squash is?
DSC03211
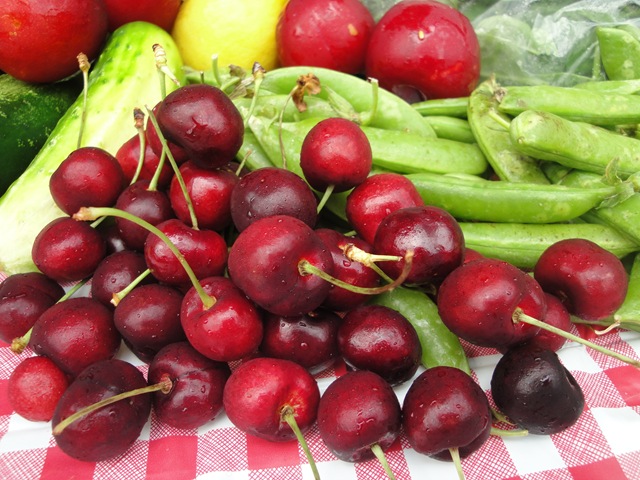
I didn’t know what a fan I was of cherries until I tasted these sweet beauties.  Can you say YUM?? 
DSC03221
 
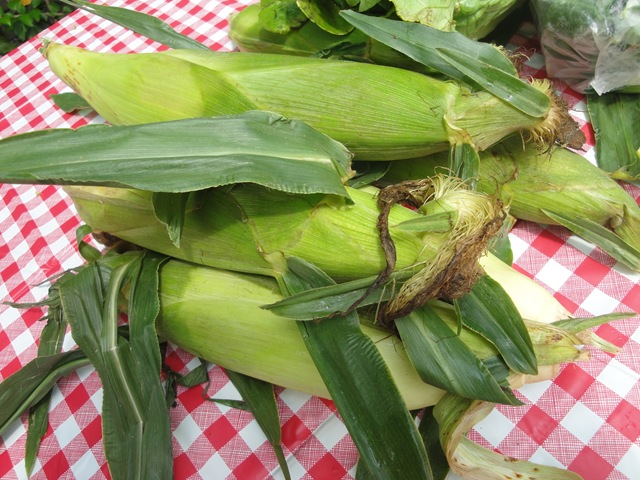
Look….NON-GMO corn…..what a rare thing indeed!!!!  This corn was SO sweet and juicy….unbelievably good!!
I’ll be getting a regular full share every other Tuesday, with a sneak peek of what will be included the Saturday before.  The items change depending on the season and what is available. 
Here’s a list of what I got this week:
Leafy vegetables
1 head romaine lettuce
1 bunch crispy kale
1 large bag spinach
 
Vegetables
very large butternut squash
6 ears corn
3 cucumbers
small bunch broccolette
half lunch bag sugar snap peas
 
Fruit
large honeydew melon
2 lbs red seedless grapes
1 lb strawberries
6 oz. blueberries
6 red plums
2 lemons
6 bananas
1/4 lunch bag cherries
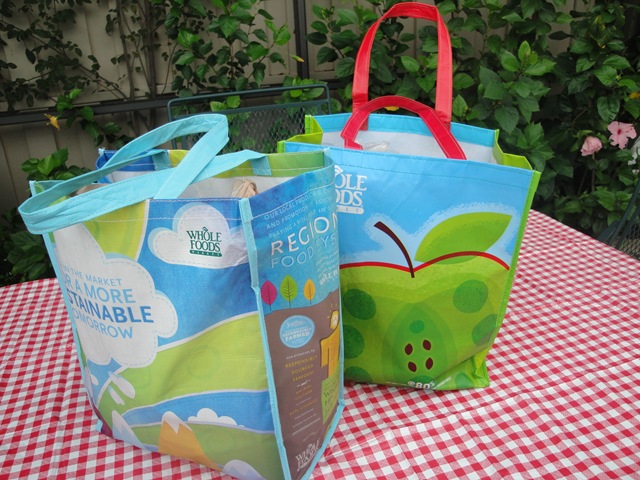
So much produce it filled 2 large reusable Whole Foods bags!!  Can you feel my excitement?
DSC03198

We’ve been eating small fruit salads everyday…SO GOOD!  The girls and I are in heaven.  I am loving the grapes!!  Organic grapes (if you can find them) are always so pricey!  I think the biggest surprise for me has been the sugar snap peas.  After rinsing these and biting into them RAW, I remembered the taste from my childhood.  We used to eat them right off the vine from my grandparent’s garden growing up.  The taste sure took me back!!

If you are local (in Florida), you should give Annie’s a try.  It is definitely a great value for the money.  It forces us to eat more fresh produce than we had been eating, as well as eating outside the box.  There are no strange veggies I have to figure out how to fix, and recipes accompany my share in an email.  Periodically (maybe seasonally) I’ll post on my share.  But you’ll definitely see these influencing some of my recipes and blog posts. 

What kinds of fruits and veggies are showing up at your farmer’s markets and in your CSA shares?

9 Comments

Mango rhubarb tart and the perfect easy crust!

Still trying to find my balance in the blogging world…between time spent reading blogs, getting inspired and then creating in the kitchen AND actually putting my thoughts and recipes down here on the blog.  I have such a back log of photos and recipes that are waiting to be shared.  I am hoping to post a bit more frequently in June than what I’ve been doing so far…hopefully you all will bear with me.

I bought some frozen rhubarb at Publix since I couldn’t find any fresh, and had been looking for something to do with it.  A vague memory from childhood, and the newfound knowledge that it would be refreshingly tart had me craving it.  One afternoon I thought of the perfect thing to do with the rhubarb, some mangos I’d gotten on sale that needed to be used, and a crust that I couldn’t stop thinking about since last November.  Yes…this crust IS THAT GOOD, and it’s super easy too!

So I set to work in my kitchen.  I put the frozen rhubarb chunks in a medium saucepan, sprinkled in some honey granules (you can use sugar, honey or other sweetener), added 1 tablespoon lemon juice and about 1/2 cup water and set to work peeling and chopping the mangos which was probably the most time consuming part. 

Topping
3 ripe mangos, peeled and chopped
Half bag frozen rhubarb (found at Publix)
Sweeten to taste with choice of sweetener
1 Tbsp lemon juice

Combine all ingredients and cook down while making the crust.

After the mangos were added to the rhubarb, I set the burner to low, preheated the oven to 350 degrees and began working on the crust.  I originally discovered this crust as part of these pumpkin cheesecake bars at Nutmeg Nanny.  If you haven’t stopped by her blog…definitely check it out. She’s got many great recipes, and tries to keep things more natural. I’ve made them…they’re delicious, and have since used this crust for many different things.  I love it!! 

Crust
1 cup walnuts or pecans
3/4 cup oats
3/4 cup sugar (I use honey granules)
1/2 tsp sea salt
1 cup flour (I use freshly ground whole wheat)
1 stick butter, softened

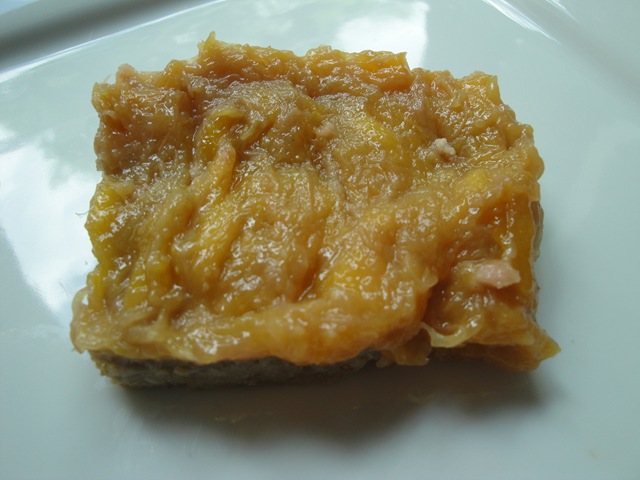
Place nuts in food processor and pulse until chopped well, then add in oats and pulse again.  Continue adding the rest of the ingredients and pulse as needed while combining.  Grease a 9 x 13 pyrex pan and press crust into pan.  Bake crust by itself for about 20-25 minutes.  Then top with mango/rhubarb mixture, and bake for another 20 minutes or so.  Cool on rack and slice into bars when completely cool.  They are delicious warm, but even better cold!

DSC03121

The girls loved these!  Keep them stored in fridge, but from past experience with the pumpkin cheesecake bars I know they freeze well.  I made so many goodies last fall that I had to freeze quite a bit of them in bite size chunks.  They are tasty frozen too!  You can also top this crust with many other fruit toppings…you are only limited by what you can conjure up!   
  
What toppings would you use? Do you have trouble keeping up in the blogging world? Do you have any tips for keeping up?
“Facebook recommends” and “shares” are much appreciated! Thanks!


10 Comments

Time for grilling and the BEST sauce ever!

Last summer I stumbled upon our preferred method of preparing and eating steak.  Since then we can’t seem to eat it any other way…it just doesn’t compare!  Not to mention we’ve discovered the best place to buy our meat.  I can hardly believe it has taken me this long to post this, but here it is…just in time for summer and grilling out!

We feel strongly about buying meat that comes from animals that have been raised humanely and without growth hormones or antibiotics.  I won’t start a whole “to eat” or “not eat” meat debate here, but just know I come from a vegetarian background (I myself was vegetarian for 7 years as an adult, and my parents have been vegetarian for over 30 years…now vegan, and my mom is a raw vegan).  I get asked all the time how or why I started back with eating meat…not the topic today, but let’s just say I’ve found the balance that agrees with me, my body and my belief system.  I love a good steak, but I’m equally excited about going out to eat with my mom tonight at a raw vegan restaurant!

Back to the point of this post…we are very fortunate to only live about a 5 minute drive from Whole Foods.  At first I thought Whole Foods was only a store for periodic shopping…and that there was no way we could integrate it into our food budget.  After numerous visits and really getting to know their products and prices, I realized that Whole Foods is a store that carries products that are staples in our diets with prices we could afford.  Yes, there are specialty items that I would never pick up (though I want to), but there are many items we purchase there for the same price as our regular grocery store or less (and of better quality ingredients).  They even carry their own generic brand (365). 

Many staples I buy at Whole Foods include hormone-free cream cheese, hormone-free milk, organic corn tortillas, organic popcorn, organic ketchup (less $ than my regular store), unsweetened shredded coconut, organic short grain brown rice, organic quinoa, organic lentils, hormone-free whole milk, plain yogurt, organic canned beans, canned tuna, crackers, organic mac and cheese (nice to have a few quick meals for hubby on hand when I’m not home…or that my 11 yr old can make), produce that is on sale ($1 per mango this past week), and their fresh hormone-free meat!  Yes, I try to stay away from processed foods…but living in the real world and still having a toddler at home means that I love having a couple quick, easy and healthy meal options for when I’m working or out one night.  It’s the exception, not the norm!

Whole Foods frequently runs specials on meat.  I am able to get hormone-free chuck roast for $4.45 a pound (on sale…you can even check their sale flyers online).  Another we like is their top sirloin on sale for $5.99 a pound.  I walk up to the counter, place my order with the butcher and all the meat is wrapped per my specifications fresh from the display case.  At least once a month they run sales on ground beef for $3.99 a pound.  I can stock up and have it wrapped in 1 pound increments ready for the freezer.  It comes in butcher paper, and I then put 2 of those in a 1 gallon freezer bag. 

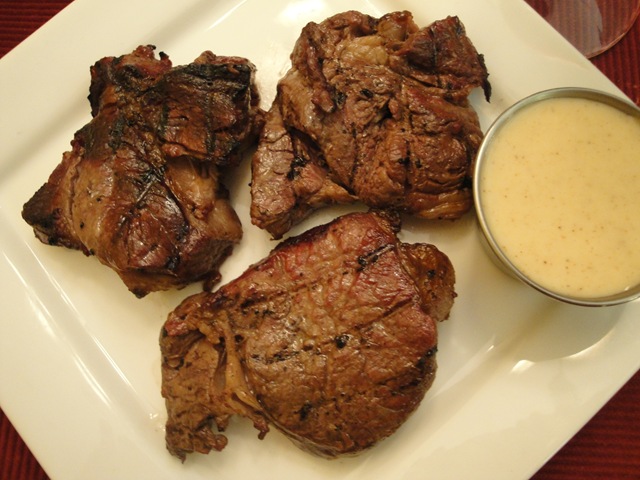
I usually buy 1.5 to 2 pounds of chuck roast per meal.  I take it home and cut it into 1.5 inch cubes of meat.  My hubby and place the meat on bamboo skewers while the grill heats up.  I’ve always been told that chuck roast is a poor cut of meat…too tough.  Well we’ve never found that to be the case with the chuck roast from WF.  It is well marbled with fat.  We also don’t overcook it.  We grill it until it is medium rare…so that may be another trick in keeping it tender.  We’re always in a hurry so we never marinate.

While the steak is grilling, I whip up our favorite dipping sauce.  It is EASY, and tasty!!  I found it last summer while searching online for a recipe for the white sauce they use in Japanese Hibachi restaurants.  It’s not the same…fairly similar (a bit sweeter).  I found it at All recipes, and it is technically labeled a shrimp sauce.  We’ve used it on shrimp, fries, sweet potato fries, etc.  It’s that good!!!  You will definitely want to print it out and try it.  Let me know what you think!

Japanese Shrimp Sauce I from All recipes

1 cup mayonnaise
3 Tbsp sugar
3 Tbsp rice vinegar
2 Tbsp melted butter
3/4 tsp paprika
3/8 tsp garlic powder

Mix all ingredients, adding melted butter last.  Cover and refrigerate.  We usually use it right away, but it does keep for at least 5 days or so.  I usually cut the recipe in half for our family of 5 so we don’t have leftovers.  I haven’t tried this with homemade mayonnaise yet, but I’m sure it would only taste that much better! 

Do you have any homemade sauces you can’t live without?  I’ve found lately that I am quite the sauce girl….love the sauce as much or more as I do the food I’m dipping!  And if you have a recipe similar to this…but tastes more like the one I’m looking for….please share it with me! 

Here’s our favorite at home “date” meal…let me know if you try it!
DSC01462 *The meat is not skewered in the picture I’ve included, but it’s the only one I have for this recipe.  Hope you don’t mind…I certainly didn’t want to put this post off any longer!

21 Comments

Romance, reminiscing and a recipe

DSC01434

I can’t believe May is already here!  Where does the time go?  I’ve been meaning to get this recipe up for several weeks.  I’ve found that as much as I love this blog, life just doesn’t stop for it.  My weekends of late have been filled with travel…which I love, but don’t get to do enough of.  One weekend we had a spontaneous trip up to Disney again (love those season passes!!), this time with friends.  And the weekend before this past one, my husband and I got away to celebrate our 13th wedding anniversary!  We had an amazing, MUCH needed, relaxing kid-free weekend at Fort Lauderdale Beach. 

DSC02518
Sleeping in, vegging on the beach, several meals out, enjoying live music, cruising the waterways by boat, strolling down Las Olas Blvd…..days and nights blurring together seamlessly in a way that seems vaguely familiar from our pre-children days (over 11 yrs ago).  To worry only of our own wants and needs…what do we want to eat?  Where do we want to go?  What do we want to do next?  No other considerations…or opinions…or arguments.  Bliss really! 

And as much as we love our girls…we really do…every couple needs time away like this.  To refresh, renew, rekindle…to keep that fire burning.  It makes us better people, better spouses and better parents!  And who can beat this view we had from the 16th floor of our hotel?  It doesn’t get any better than this…

Anniversary view
Our anniversary wasn’t until yesterday (May 3rd), but you have get away when the childcare permits (thanks Mom!)  And though we are celebrating 13 years married, we’ve been together for 17 and known each other 20!  We actually met (and fell in love) in February 1990 when we were both in the Navy (and very young)…right before the first Gulf War started up. 

Yes…it’s one of those love stories where you meet and fall in love under the wrong circumstances…then are torn apart by government orders to separate ends of the earth during the war (I was stationed in Pearl Harbor!!)…try to forget each other and never succeed…lose track of each other…only to find your way back to each other 3 years later and can finally be together!  It’s quite a romantic love story like you see in movies and read in novels really….but we’ll save it for another time!  Enough of the romance and reminiscing…..now onto the recipe.

The inspiration for this recipe stems from my trip last fall to the mountains of North Carolina. I was actually meandering through this farmer’s market in Sylva, NC


when I tasted Quinoa (keen-wah) Tabouleh for the first time.  It was amazing!!  I had heard of quinoa several years ago…how nutritious it is, that it is not really a true grain, but a seed…that it is packed with protein…a superfood full of calcium and iron!  I had been wanting to try it, but had yet to stumble upon the right recipe.   On this particular morning, I finally did!  It was so light and refreshing, with bits of cucumber and sweet tomato.  So tasty!  I knew when I got home from that trip, I would be searching the internet to learn all I could of tabouleh and set out to create my own rendition.  At that’s exactly what I did.

Quinoa Tabouleh

1/2 cup quinoa (organic, purchased at whole foods in bulk section), rinse well to prevent bitterness
1/2 cup fresh tomato, chopped (or more per your preference)
1 cucumber, peeled, seeded and diced (or more, depending on your preference)
1/4 – 1/3 cup red onion (or scallions), diced
1/4 – 1/2 cup olives of choice, diced (optional…save to top with)

dressing:

1/4 cup juice of lemon, freshly-squeezed
1/4 cup good quality extra virgin olive oil
1/2 tsp sea salt
2 cloves garlic, crushed
1/2 cup fresh mint, finely chopped (or 1 cup parsley)

Rinse quinoa in bowl and drain water out.  Bring 1 cup water to boil, add quinoa and cook covered on low heat.  Cook for approximately 15 minutes or until water is completely absorbed, drain existing water (if any), and fluff with fork.  After cooking you’ll notice that quinoa has these cute spiral tails extending from the seed.  I think that’s part of it’s charm! 

While the quinoa is cooking you can chop your tomatoes, cucumbers, onions, and olives.  Set aside.  In a small glass jar I combine all the components for the dressing and shake well.  I take a glass pyrex bowl (one that I’ll use to store the tabouleh in) and combine the quinoa, chopped tomatoes, cucumbers, and onion.  Then I pour the dressing over the quinoa mixture and combine thoroughly.  Refrigerate for at least 2-3 hours (or longer) for best taste.  If taking somewhere, I like to make this the night before for the best flavor. 

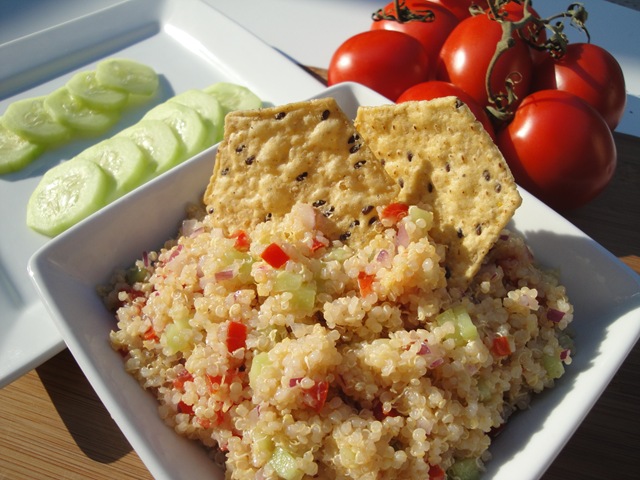
I serve this with Food Should Taste Good chips or slices of cucumber.  I frequently sprinkle crumbled feta cheese over the quinoa tabouleh…so good!  I also don’t mix the olives in, but add them on top with the feta. I have yet to have parsley or mint on hand, and it still tastes amazing.  This is the perfect dish to take out on the boat, or for a day at the beach this summer….portable for any type of picnic or long road trip!  It energizes and fills you up, without the sleepiness you usually get from meals heavy in refined (white) flour/carbs. 

Try it…you’ll love it…and like me you’ll probably find yourself toting this around a lot this summer.  Quinoa is very versatile, mild tasting (and takes on the flavors it’s made with), can be used in place of rice or other grains…the possibilities are endless.  And the bonus…it’s also very good for you!

Related Posts Plugin for WordPress, Blogger...
13 Comments