Fresh pressed beet juice & update

Beet juice
I’m so thrilled to be back in my favorite writing space, and can’t believe the year has escaped me. All my valiant plans for jumping right back into the blogging arena once again were waylaid by real life! It’s been such an amazing year so far though, and my family has had many opportunities for travel. During spring break we were able to take and show our girls my birthplace and home for the first 7 years of my life….Washington D.C. and the Northern Virginia area. We stayed with my husband’s cousin Sheila in Maryland right on the metro line, and were able to metro into the city daily and show the girls all the sites. We also visited family including my 93 year old still independent grandmother on my dad’s side. And I would be remiss if I didn’t mention our Florida born and raised girls played and sledded in snow for the very first time.

We also just came back from a trip to New York City! It was the trip of a lifetime, and I was so excited to share my love of NYC with my husband and girls. Ever since getting a taste of how special it really is on my first trip there in 2012, I’ve been dreaming of traveling there with my family. This time instead of only having a weekend (which was really just a tease), we had an entire week! Wow….pinch me, I’m still in shock! And in between those 2 trips we also journeyed up to North Carolina for our annual 4th of July family reunion (which we missed last year). So many travel posts and pictures to share with you all.

In other news, we’ve had major house renovations due to our hot water heater flooding and ruining my hardwood floors (which has led to many other projects as you can imagine), celebrated my oldest daughter’s sweet 16 with a huge birthday bash in March, sent our two oldest daughters away on mission trips in June (our middle daughter’s first), welcomed my mom into my neighborhood (she bought a house a half mile away), and I ran my first 10k race. Countless kayak adventures, beach time, and oh yeah….my husband completed a 60 day “juice only” juicefast this spring. Kind of a big deal! So many thoughts and experiences to share here, but for now I’ll start with a simple recipe.

Today I’m sharing one of my favorite fresh-pressed vegetable juices….BEET JUICE! Who me? I never really thought I liked beets, let alone the juice of a beet. Even when we started our juicing journey back in 2013, as much as I wanted to try beet juice….I just couldn’t bring myself to do it. I have friends who love beets, and to me I just couldn’t get past that earthy flavor. Turns out there’s a trick. Wash and peel your beet, and it worked! This juice is amazingly refreshing, and so good for you.

If you think you don’t like beets, I’m going to try to persuade you to give this juice a try. I was scared at first too…yes literally. Beets can be very intimidating. I had heard they stain your hands, but that really didn’t last long. I don’t know why I was so worried about the earthy taste, but the peeling and washing trick really worked. I have to give credit to my friend and cousin-in-law Sheila for helping inspire me to give juice beets a try. We experimented together and this recipe is what we came up with.

Do you like beets? Have you ever juiced them? Let me know what you think if you try this recipe.

Fresh pressed beet juice
Author: 
Recipe type: Beverage
Prep time: 
Total time: 
Serves: 1
 
This refreshing beet juice is tart and sweet and definitely healthy.
Ingredients
  • 1 beet, peeled and scrubbed
  • 1 granny smith apple
  • 1 lemon, peeled
Instructions
  1. Using your juicer (we own the Breville juice fountain multi-speed juicer):
  2. Place 1 beet, 1 granny smith apple and 1 peeled lemon into juicer and juice.
  3. Stir juice and pour. I like mine over ice.
  4. Can be refrigerated for approximately 24 hours. Can also be frozen.
Leave a comment

Whole30, the holidays & a brand new year!

Beach

Happy New Year! I’m a bit late, but it’s still the new year and I’ve haven’t stopped by in awhile, and I miss you guys!So much going on (of course) with Thanksgiving and a trip to Asheville and to see family, and the whole Christmas season is always a whirlwind, but seemed to go especially fast this year. Right? I hope your new year is starting to come together nicely. It’s seriously nice to get back into a routine, don’t you think?

I’ve been just bursting to share my Whole30 experience with you guys. I started in mid-September as a birthday present to myself, and felt so amazing that I went straight into a second Whole30. Somewhere after that I stopped counting, and kept to all my Whole30 meals for Thanksgiving. The day after I decided to indulge in a few gluten, dairy or sugar items because I’d reached my goal and decided I could maintain control. One of my splurges was Mellow Mushroom pizza….it was my first time there, and we had a nice lunch out with my brother’s family. I have to say….totally worth it! Happy to say I was able to maintain control, and came back after Thanksgiving and didn’t jump right into eating everything I wanted just because it was the holiday season. Yay me!

Throughout December I definitely planned for certain items that weren’t Whole30, but most of my meals day in/day out were Whole30 compliant. I just feel so much better when I eat this way! Some of my traditional holiday treats I made gluten-free, but others just wouldn’t be the same with the tinkering. I realized my beloved egg nog was now too sweet for me. Then again on Christmas Eve and Christmas Day, I splurged a bit, and off and on that weekend, but only during that week did I start to feel the effects of eating too much sugar and gluten. Christmas Day and the few days that followed I felt more tired and generally sluggish, which motivated me to get back to Whole30 again.


Now since New Years Day, I’ve been following a Paleo/Whole30 hybrid about 80-90% of the time. Thankfully I feel great! It’s amazing how well our bodies feel when we eat clean, and how we quickly feel bad when not eating the right foods. I would definitely say that Whole30 at least one time through is enough to break bad eating habits. By the second week, it became second nature for me and the energy I started to feel made me want to continue eating this way for the rest of my life.

If you haven’t tried Whole30 (which is very similar to paleo and the Daniel Plan), I encourage you to commit to just 30 days. Any sacrifice you might feel you’re making by giving up certain foods, is totally made up in by how good you feel! I want to hear from you…..have you tried Whole30? Are gluten-free or follow a paleo lifestyle?

I can’t wait to share with you guys more details like my weight loss, Whole30 meals and recipes and tips to make it easier on you. In the meantime, be sure to check out and follow my Whole30 board on Pinterest which is full of great Whole30 recipes. Let me know if you want to pin to it, and I’ll add you. I’m really excited about Whole30, clean eating, healthy living and being the best you that you can be in this new year, and I’d like to create a community where we can support each other in this lifestyle!

I’m making it a goal of mine to just share from my heart and life whatever I want when I want without constantly second guessing myself what to post, or wondering if I have the perfect picture to use or if I’ve gotten it “Pinterest Perfect” by adding text on it. I love my blog, and I want to get back to the creativity and spontaneity of it from years ago when I first started. Everyone seems to be blogging now, and blogging has changed a lot….so I’m just going to get back to my blog roots and roll with what feels natural to me. Hope you’ll join me!

Leave a comment

Taco salad & childhood friends

Taco Salad
Friends add such a layer of joy to life! Not only is it fun to have girlfriend time with our friends, but it’s also fun to have shared mom time. You know….times where you hang out with your kids for play dates, or outings together. If you’re lucky, once in a blue moon the stars align and your hubbies both work late on the same night….and you serve your kids dinner together. And maybe eat cookie dough out of a bowl for your dinner. 😉 And if you’re really blessed, at times you even share vacations together.

I’m blessed to have several childhood friends still in my life. And one of my very best childhood friends, Donna, I’ve known since we were 11 and I moved into the house next door to hers. It was the summer of 1980, and we were both about to start 6th grade. Back in our day, 6th grade was the highest you could go up in elementary school…and junior high was 7th and 8th grade. Nowadays, we have middle schools that are from 6-8th grade, at least around here. My middle daughter is in 6th grade, and the age I was when I met my good friend Donna.

Donna’s family was like my second family growing up. Her house was my second home. Most days after school you could find me and Donna hanging out at her house, making afternoon snacks (sometimes even full on breakfast for snack…bacon and eggs!) and watching General Hospital together. Had to have our Rick Springfield fix! Over the years as we’ve grown up, we haven’t grown apart. I was in her wedding, she threw me my first baby shower. I have 3 girls, she has 2 girls. We both even had premature infants….for both of us it was our first daughters…both born early at 33 weeks, small and by emergency c-section. And our girls have even become friends. So neat to see our girls play together over the years.

And even though we live miles away (me in Florida, her in North Carolina), we still always pick up right where we left off. Donna still lives on our old street, next door to her parents…and when I come home, her mom runs our to greet me, tears streaming and hugs my babies as if they are her own grand babies. Most say you can never “go home” again, but in my case….it feels like I can, and I do! We’ve gone up to visit almost every summer these past 5 years, and when I peek out of Donna’s windows I can see my bedroom window from my childhood home. Donna is like a sister to me, and we’ve also been blessed to vacation together. We’ve spent time at her beach house, and a couple magical vacations at our happy place….DISNEY!!

And it was one of these Disney vacations where this taco salad happened. We were staying with Donna’s family in their town home, and one night it was taco night. We prepared all the fixin’s for tacos, and Donna shared with me one of her many secrets for easy meal time. Instead of putting tacos together, you crumble up tortilla chips or chop lettuce for your base, and then layer up your very own taco salad. Easy, simple and definitely fast. And I didn’t miss the taco one bit!

Donna is an amazing cook, and whips up meals for her family all the time in the blink of an eye almost effortlessly. She and her home (and family) are the very definition of southern hospitality. When you stay with Donna, you not only feel like family….but somehow she makes it seem like you are no trouble at all. Like you….and your 3 kids and hubby…..have always been there, and aren’t in the way one bit. Every time I stay with Donna, I pick up new tricks to help make things run smoother at my house. One time we were going on a picnic after checking out the NC Transportation center, and Donna packed a picnic in record time. Lunchmeat and condiments into the cooler. Loaf of bread, plates, snacks etc. in a bag. And novel idea….we made the sandwiches at the picnic!! Why had I never thought of that?

So though this is more of a food idea than a recipe, I would be remiss not to share it. The taco salad has become a regular in my meal rotation, and I’m sure it will in yours too. Easy variations can be made….grain-free? Just use lettuce as your base. Dairy-free? Just leave out cheese and sour cream. Vegetarian? Just leave out the meat. I happen to like my taco salad with ground beef that I make with my own taco seasoning. Making your own taco seasoning is definitely less expensive, but the main reason I make my own is to control the ingredients. No MSG, no sugar, no ingredients I can’t pronounce.

Taco salad & childhood friends
Author: 
Recipe type: Mexican
Prep time: 
Cook time: 
Total time: 
Serves: 6
 
Ingredients
  • Tortilla chips
  • Ground beef
  • Taco seasoning (preferable homemade)
  • Lettuce, chopped
  • Cheese, shredded
  • Olives, sliced
  • Tomatoes, diced
  • Onion, minced
  • Salsa
  • Sour cream, optional
  • Hot sauce, optional
  • black beans, optional
Instructions
  1. Not really an exact recipe. Make ingredients as you would for taco, except taco shells
  2. Brown ground beef and add taco seasoning (homemade is better for you and less expensive)
  3. Prepare all other ingredients and set aside
  4. Everyone assembles their own taco salads
  5. For grain-free, leave out the tortilla chips
  6. For dairy-free, leave out the cheese and sour cream
  7. For vegetarian, leave out the beef


Leave a comment

Disney’s Night of Joy & Seven Dwarf Mine Train Review {Family Fun!}

20140913-091149.jpg

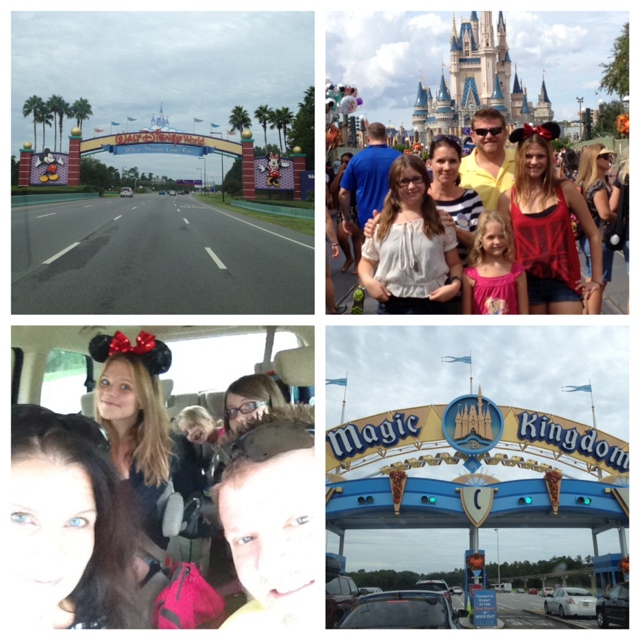
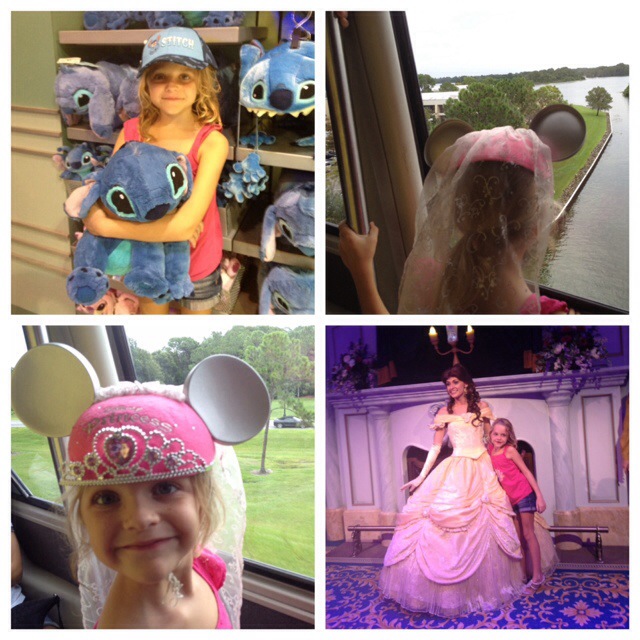
Last Saturday morning we got up early for another family adventure! We are big time Disney fans, and as frequent season pass holders we really do go through Disney withdrawal when we don’t have them. We’ve been blessed to have had them 3 times over the years, but it’s been 16 long months since our last family Disney trip. Our 3 girls have been asking all year to go to Disney’s Night of Joy. Our oldest daughter has friends that go with their youth group, so of course she wanted to meet up with them. We figured this would be a great year to go because the Disney Night of Joy ticket is almost half off regular park tickets, and since we don’t have passes….it was an inexpensive Disney park ticket.

We were also excited about all the great Christian bands playing! Some of our favorites playing Saturday night (the second night which is the night we went) were MercyMe, Casting Crowns, and Britt Nicole. Disney’s Night of Joy happens every year in early September, and Disney shuts the theme park down for regular attendee’s which means you have to have a separate event ticket to attend. Regular pass holders are not able to attend Night of Joy if they don’t have a special event ticket. I’ve been wanting to attend Night of Joy for over 10 years, but let’s face it….as great as the concerts would be….I’m hard pressed to pay an additional $54 a person plus tax when we hold season passes.

20140913-091207.jpg

With many variables up in the air, we only finalized our trip plans 3 days before the weekend. We had Disney dollars to use, and wanted to use them for our Night of Joy tickets. Because of waiting to the last minute to make our plans, I wasn’t able to get them on a redemption card in time to purchase our group rate tickets. This led to an opportunity to stay on property. We’d buy the tickets out of pocket, and use our Disney dollars for our hotel and food. Perfect! All Disney fans love staying on property. Over the years we’ve stayed at All-Star Music and Movies (value resorts), and through food blogging opportunities we’ve been blessed to stay at the Grand Floridian (2013) and Polynesian (2012)…(both deluxe monorail resorts). Last September we met our homeschool group friends at Fort Wilderness to camp together…another FUN Disney experience!

As much as we love staying on property, we are also die-hard Windsor Hill Resort fans. If you’re looking for an inexpensive option off property to stay in a spacious home close to the parks (it works out to be less expensive than nightly hotel rates!!), the like new Windsor Hills townhomes, condos and even big houses are for you. For trips longer than a week, this is where we stay. Information for renting here or directly through VRBO (vacation rental by owner). I really do need to do up a post on our stays at Windsor Hills Resort.

20140913-091230.jpg

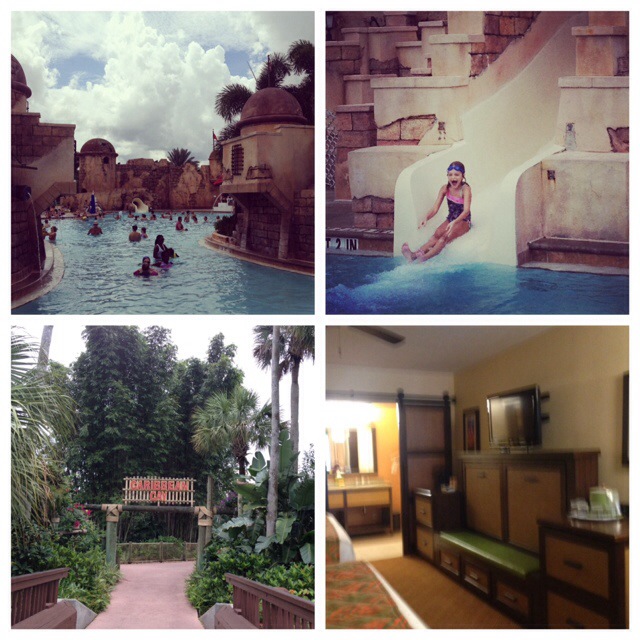
This was our first time staying at a Disney moderate resort, and the girls were super excited! We got a special group rate because of our Night of Joy group rate through our church youth group, and had an amazing time Sunday hanging out at the resort. There were many Disney activities at the pool….an activities coordinator did lots of games (with prizes!), relays and activities with the kids poolside (hula hooping and Disney trivia games….my girls won!!) My oldest daughter hashtagged her picture on Instagram #DisneytriviaWINNERS exclaiming that “watching countless hours of Disney movies pays off.” 😉

We were very impressed with Disney’s Caribbean Beach Resort. They’ve been renovating rooms, and we stayed in Aruba 52 which was renovated, and had a trundle bed for our littlest (which she loved!). I can’t believe I didn’t get a picture of it unfolded. You can see the trundle in the last photo below (it’s under the tv), and it just opens up (folds down from the wall). A cute mural of Mickey and Pluto is painted inside on the wall part of the trundle….Mickey laying on a hammock with Pluto sitting beside him on a beach. So cute! Here’s a link to see a picture of it (and many photos of the resort).

20140913-091251.jpg

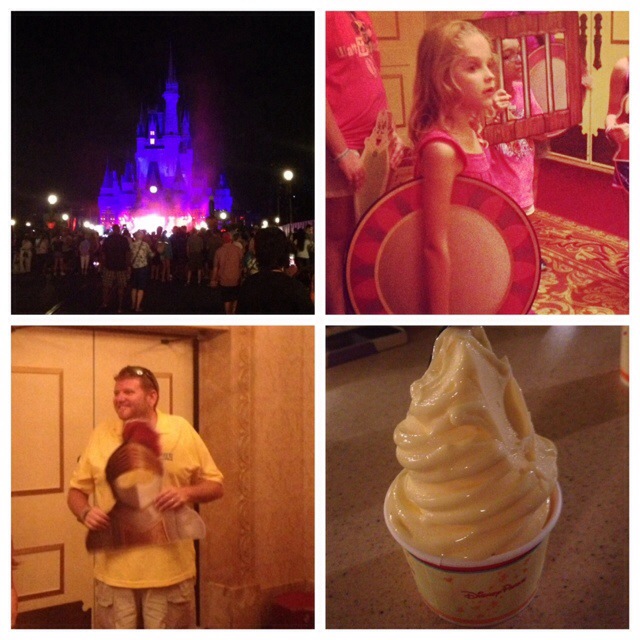
We only had 9 hours in Magic Kingdom Saturday night, but we sure made the most of it! The park closes for regular attendee’s at 7pm. Night of Joy technically runs from 7 – 1am. The group ticket gets you into the park at 4:00 which gives you 3 extra hours to ride rides. We were told by one castmember that they technically let everyone into the park at 4:00 whether it’s a group ticket or not. From what I could tell, that seemed to be the case. Night of Joy also meant fastpasses weren’t being used, but since there were less people in the parks….you really didn’t need them. Most rides only had a 10-15 minute wait, many were walk on rides (especially when a concert started on the main stage in front of the castle), and some had long lines regardless because of their popularity…..like Big Thunder, Splash Mountain, Space Mountain and the new Seven Dwarfs Mine Train ride!

There was FREEDOM in a sense from not using fastpasses, because we are quite adept at making the most of them which always means hubby or one of us running down a fastpass which does mean a lot more walking. This was our first time having magic bands, but because there were no fastpasses, they were only used to open our hotel door. Because Disney is always changing and evolving, we still have the fastpass plus system to learn next time we go but I’ve heard good things about it. Change can be hard for die-hard Disney fans (as in the case of learning a whole new fastpass system), but is also very fun in the form of new rides and attractions!

20140913-091314.jpg

This time the new ride was the Seven Dwarfs Mine Train in Fantasyland….a ride we were all super excited to try! I suffer from vertigo, and though I can keep it at bay most times….it also limits me at amusement parks. I can’t ride most roller coasters. Back in the day, hubby and I used to ride the big, crazy looped upside down rollercoasters like Kumba at Busch Gardens, but not since I’ve been dealing with vertigo (16 years). That means I get my thrill from the drop in the Pirates of the Caribbean ride, Soarin’ and Maelstrom in Norway. I was excited to try it because I had heard it was a cross between Barnstormer and Big Thunder Mountain. I used to love Big Thunder before my vertigo, and had tried it once with my oldest daughter a few years back. It didn’t set off the vertigo, but there were 3 corkscrews in a row that almost got me. 🙂

I also researched it online, and watched videos on you tube. Since it was described as tamer than Big Thunder and also a smooth ride…I was excited to give it a go. I also love anytime we are able to add to the rides we can ride as a family since I obviously don’t ride the Disney mountains with my family. The wait for the ride was 55 minutes (we waited until one of the big concerts was on stage) which wasn’t too bad considering I’ve heard it can be almost 2 hours at times if you don’t have a fastpass.

I can’t believe I didn’t snap any pictures. Main reason was that we rode it at night so I knew they wouldn’t turn out well. But still I’d love to have some to share with  you all. The wait went fairly quickly, and was well worth it! The theming while in line was amazing, and they had a few neat areas you can participate in. In typical Disney style, the Seven Dwarfs Mine Train is incredibly themed. It’s located right across from the Winnie the Pooh ride, and blends into the area beautifully. Even the trees look real! THE VERDICT – I CAN RIDE THE RIDE!!! No vertigo issues. I even rode it twice. The first time I was in the front car with my middle daughter, and the second time I was in the last car with my little one. I only notice that I shouldn’t put my arms in the air as that started to affect me. The ride is fast and smooth…fun and thrilling!! I’m SO excited that we now I have a roller coaster we can ride as a family!!

If you enjoyed this post or recipe, please pass it along! There are many ways you can SHARE. One of the most popular options is to PIN it on Pinterest or to LIKE it on Facebook. It really makes my day! To make sure you don’t miss a post or recipe you can either follow Creative Kitchen on Facebook or Pinterest. Or subscribe by RSS subscription or Email in the sidebar. It’s FREE! Thanks for reading….I love having company in the kitchen!

Disclaimer: This is not a sponsored post. Just sharing about businesses I love and use regularly.

Leave a comment

Easy gluten-free belgian waffles

Easy Gluten-Free Belgian Waffles

So it was about this time last year that I shared with you guys Pumpkin Spice Belgian Waffles! And I’m just as excited about this recipe because I’ve found that I can tweak Jennie’s original recipe yet again, and this time make GLUTEN-FREE belgian waffles. I’m new to this whole gluten-free thing, and am SO excited that this recipe held up to swapping out all purpose flour to any gluten-free flour you wish to use. They turned out fluffy and crispy…..two characteristics high on my list for waffles. Now that fall is around the corner, I’m sure I’ll soon tweak these gluten-free waffles by adding pumpkin and spice….and since I’ve had such great luck before, I’m sure they’ll be amazing!

The gluten-free adventure in the kitchen is an exciting one! I love that there are so many variations of gluten-free flours you can make, and since I’ve just begun this adventure, there is so much more for me to learn. For those of you who aren’t ready to delve into making your own gluten-free flour mix, you can just use any gluten-free flour in this recipe.

After much research, I’ve found white rice flour is a good base for gluten-free flours, and so far I’ve had success with it in this waffle recipe (made at least 10 times by me already!), and in the upcoming chocolate chip cookie recipe. Others use brown rice flour, but I’ve found the white rice flour a cheaper alternative when picking up the Goya brand near the cornmeal at my Publix. I can pick up Goya rice flour for $1.09 for a 12 oz. bag. Great deal!

I’m sure this recipe would also work well for regular waffles, not just belgian. Let me know what you think! I’d be interested in hearing about your gluten-free adventures in the kitchen!

Easy gluten-free belgian waffles
Author: 
Recipe type: Gluten-Free, Breakfast
Prep time: 
Cook time: 
Total time: 
Serves: 4
 
These gluten-free belgian waffles are quick & easy to whip up! So easy you'll never buy the expensive pre-made ones again.
Ingredients
  • 1¾ cups gluten-free flour mix
  • OR
  • 1 cup white or brown rice flour
  • ½ cup tapioca starch
  • ¼ cup sorghum flour
  • **********************************************
  • 1 Tbsp baking powder (I prefer aluminum-free)
  • ½ tsp sea salt
  • 1¾ cups whole milk (OR for DAIRY-FREE I've used almond milk with success)
  • 2 large eggs
  • 1 stick butter, melted
  • 1 tsp pure vanilla extract
  • ** Other dairy-free options: try coconut milk. **
Instructions
  1. In a large bowl add gluten-free flour mixture, baking powder, salt and mix well.
  2. Add milk, eggs, vanilla and mix just till combined. Mix in melted butter, and mix until just combined. Let sit for 5 minutes or so while waffle iron is preheating as this allows the batter to thicken and rise.
  3. Preheat waffle iron. Spray with olive oil or coat with melted butter.
  4. Pour onto waffle iron until you have a light coating. If you pour on too much, it will leak out the sides. This might take trial and error the first waffle or so. I've found about 1 ladle full is about right.
  5. ** This batter made 4 - 5 large gluten-free belgian waffles **
  6. Store leftovers (if there are any) in a large Ziploc bag in fridge. Keeps for several days, or can also be frozen. Warm up in toaster or toaster oven.
  7. Top with butter, pure maple syrup and berries if desired.


If you enjoyed this post or recipe, please pass it along! There are many ways you can SHARE. One of the most popular options is to PIN it on Pinterest or to LIKE it on Facebook. It really makes my day! To make sure you don’t miss a post or recipe you can either follow Creative Kitchen on Facebook or Pinterest. Or subscribe by RSS subscription or Email in the sidebar. It’s FREE! Thanks for reading….I love having company in the kitchen!

Related Posts Plugin for WordPress, Blogger...
Leave a comment