An impulsive husband and how to find local free-range eggs

Rabbit cage

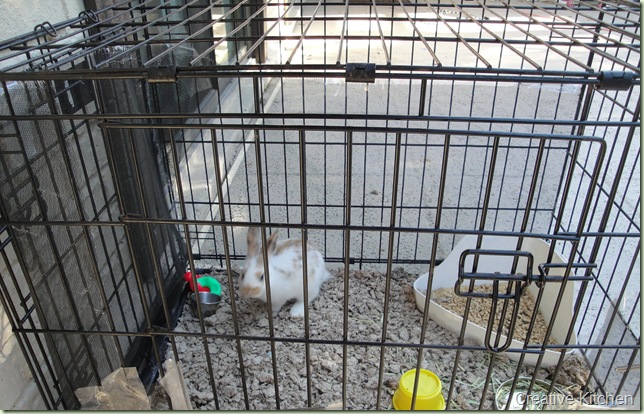
Which comes first the chicken or the egg…..or in this case the rabbit! What a weekend I’ve had. This post was supposed to be up Saturday. I had the time carved out…things were peaceful, my 3 yr old Leah was napping. I ran out to greet my hubby & girls at the patio gate so they wouldn’t disturb wake Leah when they came in. That’s when my oldest daughter met me and was wildly exclaiming that daddy had bought a rabbit. Nah…he’s a practical jokester, and so is she. I knew they were pulling my leg. I open the gate only to spy hubby holding this…

Yep…a large cage containing a rabbit!! OH no, no, no I say…..he has got to be kidding. It is NOT coming in the house. A few seconds later….while I am steaming mad…hands shaking…I step aside as they carry it into the house. I honestly can’t remember the last time I felt like this. Stunned, shocked, and as a good friend said on Facebook, “words fail me.” My oldest spent her birthday money on it. I sent them to her room (all of them…rabbit, cage, hubby and ALL), and stated that it didn’t mean the rabbit was staying. I just had to get it out of my sight!! Before I blew a gasket.

Turns out my hubby talked HER into it…HE wanted the rabbit!! And if you follow me on Twitter…you saw the alert go out Saturday afternoon for HELP. This was not a discussed and mutually agreed on purchase or pet. And before you think I’m heartless…we live in a 1285 square feet home (all 5 of us!), we don’t live on acreage or even have a real yard…just a large fenced in patio…no grass. A rabbit just doesn’t seem practical. Not to mention, we just got a hamster last month. Pixie was supposed to fill the furry critter quota. Oh my…poor Pixie. She just got demoted.

Pixie

And though my husband can be impulsive, he has never done this to me before. I’ve had friends suggesting maybe he wants another baby. Uh…no!! Or that they had some recipes for me (as in rabbit). Uh…no!! But he is completely adorable with the rabbit….really it’s a bunny. She’s young and cute…but Ruby is on “probation.” I just know in a couple short months….attention will turn to another hobby. Right now it is pets….2 fish tanks containing 28 fish (13 of them baby fantail guppies which we are breeding!!), Pixie the hamster and now Ruby the rabbit. I am not allowing myself to get attached…it’s just not practical to keep this rabbit. When they lose interest, I’ll be more than happy to help find a nice home for Ruby! Any takers??

Rabbit collage

Now back to the eggs….free-range, farm fresh eggs. If you’re looking to find your very own local free-range eggs, I have a couple online sources for you. Both of these websites have locators for you to plug in your location, and find farms & suppliers near you.

Eat Wild ~ Quoted directly from their website, Eatwild’s Directory of Farms lists more than 1,300 pasture-based farms, with more farms being added each week. It is the most comprehensive source for grass-fed meat and dairy products in the United States and Canada. Producers listed on Eatwild certify that they meet our exacting criteria, assuring that their animals and the land are well-treated, that their products are exceptionally high in nutrition and free of antibiotics and added hormones. Products include: Beef, Pork, Lamb, Veal, Goat, Elk, Venison, Yak, Chickens, Ducks, Rabbits, Turkeys, Eggs, Milk, Cheeses, Produce, Nuts, Berries, Wild-Caught Salmon and more!”

Local Harvest ~ Quoted directly from their website, “Real food, real farmers, real community. The best organic food is what’s grown closest to you. Use our website to find farmers’ markets, family farms, and other sources of sustainably grown food in your area, where you can buy produce, grass-fed meats, and many other goodies.”

Free range eggs

*After part one of this post last week, I had a reader contact me on Twitter to inquire of where I purchase my eggs. I was able to direct her to these two sources, and am happy to report she found fresh local eggs in her area…success!! That’s really what this post is all about…we all want to feed our family the freshest and best quality food.

We all start out on the REAL FOOD journey at the beginning. Taking baby steps away from processed and premade convenience foods and toward food full of nutrients and vitamins…food eaten the way it was created. And when I began my journey 5 years ago, I needed help…the information out there is overwhelming. Try to keep it simple. Start out by adding more fruit and vegetables into your meal plan, and cutting out processed where you can. It doesn’t have to be all or nothing. I still use some convenience items, but I read the ingredient list for items I can’t pronounce. But that’s a post for another day.

I’m sorry for the delay in getting this post up. I’m sure after reading about my weekend it makes total sense why my ready-to-write mood was totally obliterated by the “rabbit chaos” that took over my weekend. I wish I were making it up since Easter is around the corner or that it were an early April Fool’s joke, but that’s just not the case. The rabbit fodder also created a 30-plus comment long status on my Facebook account, which was TOTALLY funny. Heck, it IS funny, especially if it wasn’t happening to me. I read them all to hubby last night, and we had a good laugh about it. And we can do that because he DID apologize…and he IS super cute cuddling HIS rabbit.

To find out the status of Ruby and her probation…you can check updates here and here.

This post is linked up with Hearth and Soul Hop, Delectable Tuesday, Works for Me Wednesday, Real Food Wednesday, Thrilling Thursday, Simple Lives Thursday, Fresh, Clean & Pure Friday, Fun with Food Friday, Food Trip Friday, Fight Back Friday, Monday Mania, Made by You Monday & Homemaker Monday.

45 Comments

Mexican omelette ~ a new favorite breakfast!!

After years and years of a grain-based breakfast (mainly oatmeal), I find myself in new territory…leaning heavily toward protein. It’s been a good change, but one I didn’t see coming. I am a HUGE creature of habit when it comes to food (or at least I was). We’re talking oatmeal daily, even on HOT summer days!! Yeah, habit. But now my taste buds seem to be constantly on the lookout for new tastes and flavors, and that’s exciting to me!

Eggs are such nutritional powerhouses, and I know for years they underwent such scrutiny and developed a bad reputation, but it couldn’t be further from the truth. Remember when egg white omelettes were all the rage? I even took part in that travesty. But hold onto that yolk, that’s the brain-food of the egg!! That’s where the majority of the nutrients are…eggs are rich in choline (which benefits the heart & brain), iron, vitamins A, B6, B12, folate, and selenium. These nutrients are especially important if you are pregnant, nursing or a growing child.

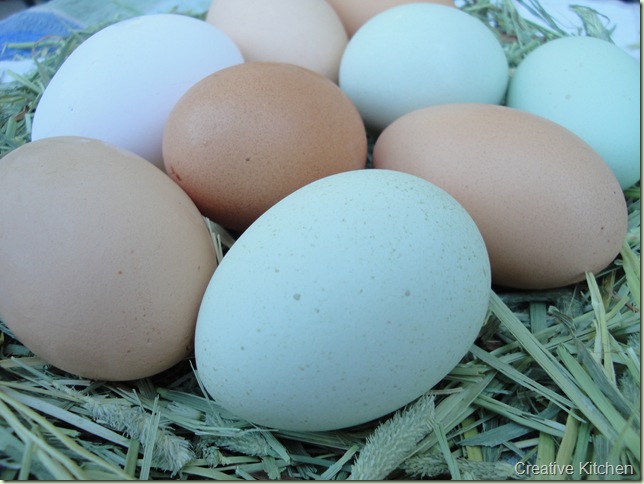
If you’re interested in learning more about all the health benefits of eating eggs, check this out.  Remember it’s also very important what type of eggs you buy and where you buy them. Last year I shared with you that we have a farm fresh egg connection, something I don’t take for granted. I know I’m BLESSED that a good friend of mine raises happy, healthy chickens…that roam, and dig, and scratch! Their eggs are like little treasure troves. Eggs the way God intended!!

Chicken collage1_thumb[4]


Perfecting an omelette is something that I’ve developed over the years. It’s not something I tried to do frequently before my 30’s because I really didn’t think I liked omelettes. I preferred my fillings scrambled in with my eggs. Then one morning, on a romantic weekend getaway to Hutchinson Island with my husband (actually I was 7 months pregnant with daughter #2…so how romantic could it be? But it was a last hurrah before newborn and nursing days began again!!), we hurried wandered down to breakfast (at whatever time we wanted to, thank you very much!!). They had an omelette station as part of our breakfast, and watching the omelette being made was an eye-opener. The small skillet was swimming with melted butter, and hot before the eggs were added. I tucked the tip away for future use.

In preparation for this post, I googled some things…the proper spelling: omelette or omelet? Curious about others’ techniques when making an omelette. There is a lot of information all over the web to assist you, if needed (even videos on You Tube). Apparently there are some 15 pages in Julia Child’s Mastering the Art of French Cooking cookbook to outline the proper way to make an omelette. Of course, after watching Julia Child make an omelette on You Tube, it’s obvious that the French omelette technique is quite different from what we do in America. It’s an entertaining little video!

DSC07303

Mexican Omelette ~ A new favorite breakfast

2 free-range eggs, rinse well before cracking
Splash cream, half & half, whole milk or water
2-3 Tbsp organic black beans (I use canned)
1 tsp minced vidalia onion
1 Campari tomato, seeded & diced
1/2 tsp cumin
2-3 Tbsp shredded mexican cheese
sea salt & pepper to taste

Pull out all ingredients, and prep them. In a small skillet begin heating 1 Tbsp butter or a bit less. I set my stove dial between 6 – 7. While the pan is heating up, crack eggs into a small metal bowl. Add milk, cream or water…just a small splash. Add in salt and pepper to taste. Beat eggs till light and fluffy.

Pour eggs into a fairly hot skillet (the butter will be bubbly and possibly slightly brown), and reduce heat to medium (about 5 on my stove dial). HINT ~ If the eggs start getting too done(set) before you are ready to add the fillings, I usually just remove the skillet off the heat for a moment.

Immediately start to spread black beans along the top of the eggs. Then sprinkle in cumin, onion, tomato and cheese. As the eggs start to set on the bottom, flip one side of eggs completely in half to other side (like a taco). Lower the heat a bit more. After a few more minutes, you flip to the other side.

The technique for omelettes (like crepes) just needs a bit of practice. I remove the omelette when the middle seems to be set (not runny). Many times, I fold my omelette with two folds (pictured above) in which you will fold 1/3 of the omelette in toward center, and then roll omelette onto remaining half.

Serving size tips ~ I used a small skilled with 2 eggs which usually serves one. When making for my girls, I used the medium skillet, up the eggs to 4 and then cut it in half when done (serves two).

*Later this week I’ll share part 2 of this post which will answer the question: Where can I find free-range eggs locally?

QUESTIONS  ~ What type of eggs do you buy? Have you made the switch to better quality eggs recently? Do you have a local free-range egg source already?

This recipe is linked up with Hearth and Soul Hop, Tasty Tuesday, Delectable Tuesday, Tempt my Tummy Tuesday, Slightly Indulgent Tuesday, Tuesdays at the Table, Let’s Do Brunch, Waltz on by Wednesday, Works for Me Wednesday, Foodie Wednesday, What’s on the Menu Wednesday, What’s Cooking Wednesday, Real Food Wednesday, Frugal Food Thursday, Thrilling Thursday, Simple Lives Thursday, Recipe Swap Thursday, Full Plate Thursday, Cooking Thursday, Friday Potluck, Friday Favorites, Friendly Friday, Fresh Clean and Pure Friday, Friday Firsts, Fun with Food Friday, Family Friendly FridaysThe Finer Things, Food Trip Friday, Pennywise Platter, Fight Back Friday, Saturday Swap, Homemaker Monday, Made by You Monday, My Meatless Mondays, Mouthwatering Monday, Mangia MondaysMelt in Your Mouth Monday, Just Another Meatless Monday & Monday Mania.

42 Comments

Homemade granola…easy, addictive, affordable!

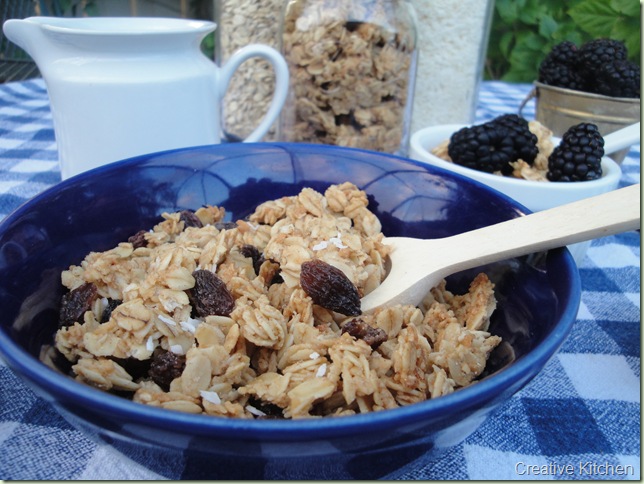
For years I’ve had a love affair with granola…so crunchy, so sweet, so GOOD. It’s one of the best breakfast cereals out there, in my opinion. Unfortunately, it’s also one of the most expensive cereals on the market. Usually close to $4.00 or more for a fairly small box. I discovered how to make homemade granola when my oldest daughter was very young, and haven’t looked back since! Now it’s one of our frugal breakfast choices…not to mention healthy, since I control what goes into it. With this quick and easy recipe for granola, you’ll have a healthy breakfast or snack in no time at all.

DSC06523

Granola

1/2 cup honey or pure maple syrup
1 stick butter or 1/2 cup coconut oil
1 tsp pure vanilla (or cinnamon…or both)
1/2 cup unsweetened shredded coconut
4 cups organic rolled oats

Preheat oven to 350 degrees. Melt butter in a saucepan on the stove and stir in honey. Add 1 tsp of cinnamon or 1 tsp vanilla. Add in 1/2 cup coconut. Stir in 4 cups old fashioned, rolled oats (I use organic). Spread on greased cookie sheet and bake for about 10-15 min (until light golden brown).

After you remove granola from the oven, set the cookie sheet on a cooling rack and cool for EXACTLY 20 minutes! Any longer and it sticks, any shorter and it doesn’t clump together at all. Scrape from the bottom with a spatula in long strokes to aid in clumping and store in a Ziploc or canning jar in the fridge. This recipe lasts our family anywhere from 4-7 days, but will keep longer.

OPTIONAL: You can add nuts or seeds to your granola. We usually don’t, but if you do then add them in the saucepan before baking. Any other dried fruit would be added after when adding the raisins. For peanut butter granola (my husband’s favorite) just substitute 1/2 cup peanut butter for the 1 stick butter.

Granola 4 picture SECOND

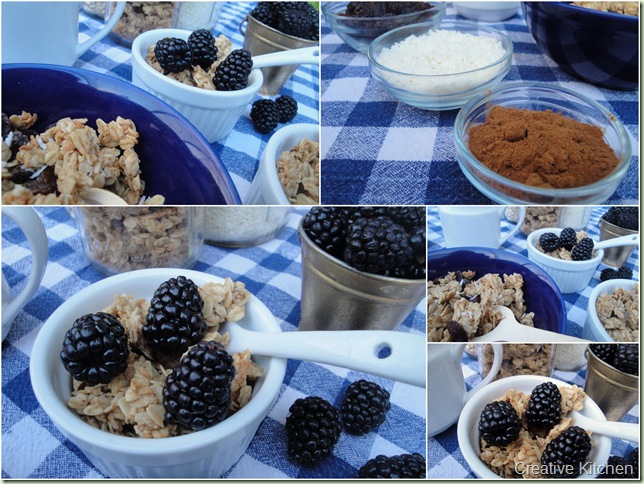
IN A RUSH: Granola skillet method ~

Melt 1-2 Tbsp butter or coconut oil in skillet.
Pour in equal amount of sweetener.
Add in a small bit coconut.
Enough oats to coat well.

Stir around at the 2 – 3 setting on stove, but don’t leave it unattended. After about 5 min, spoon onto flat plate and press down firmly. The thinner you spread, it the faster it clumps and cools. Stick it in the FREEZER and check in about 5-12 minutes later. Break it up in clumps and and it’s ready to eat!

Granola 5 picture collage THIRD

Granola is such a frugal and filling meal for kids. We eat it as a cereal with milk or with yogurt as a yogurt berry parfait. Even my preschooler loves granola, and she also ate plenty of it when she was a toddler. Do you make homemade granola, and if so what varieties are your favorites?

This recipe is linked up with Hearth and Soul Hop, Totally Tasty Tuesday, Tasty Tuesday, Delectable Tuesday, Tuesdays at the Table, Slightly Indulgent Tuesday, Tempt my Tummy Tuesday, What’s for Dinner Wednesday, What’s Cooking WednesdayWorks for Me Wednesday, Real Food Wednesday, What’s on the Menu Wednesday, Frugal Food Thursday, Taking a Stroll Thursday, Simple Lives Thursday, Thrilling Thursday, It’s a Keeper Thursday, Friday Favorites, Friday PotluckFresh Clean & Pure Friday, Friday Firsts, Boost my Blog Friday, Fight Back Friday, Food Trip Friday, Family Friendly Friday, Mouthwatering Monday, Homemaker Monday, Made by You Monday, My Meatless Monday, Monday Mania, Saturday SwapStar Recipes Collection.

42 Comments

Spring is in the air…Mahi Mahi lettuce wraps

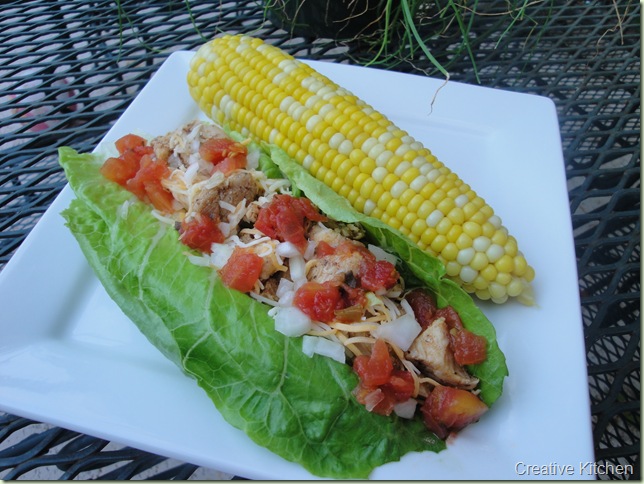
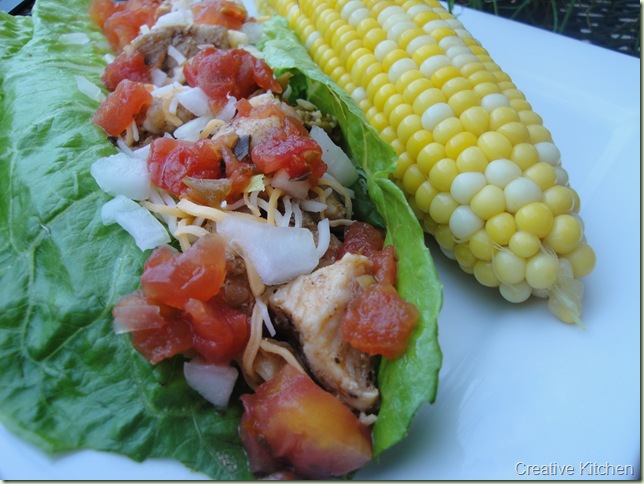
One of my favorite things to do with romaine lettuce is use it as a lettuce wrap…a healthy transport for scooping a variety of fresh ingredients to my mouth. Not only is it a great substitute when I am out of organic taco shells, but it’s also fresh, crispy and crunchy…and frugal too!! On this particular day last summer I wanted something light and tasty. I had also just received these beautiful ears of organic corn from Annie’s Organic Buying Club.

Mahi Mahi Lettuce Wrap1

To make these amazing Mahi Mahi Lettuce Wraps I just whipped up my recipe for Fish Tacos and used a romaine leaf instead of a taco shell. Definitely easy!! Definitely healthy!! One great thing I love about my fish taco recipe is that I use my own taco seasoning mix. No msg or other additives, and another money saver! I usually mix up a double batch so I have some on hand for next time.

Mahi Mahi Lettuce Wraps

You could use any filling for these lettuce wraps….beef or chicken taco fixings, black bean burrito fixings, various sandwich fillings including BLTs and slopping joes. It’s a perfect meal for spring and summer as you begin dreaming of firing up your grill. Do you have a lettuce wrap recipe or other wrap ideas you’d like to share with us? If so, please link it in your comment. I’d love to see all the great ideas out there!

This recipe is linked up with Delectable Tuesday, Slightly Indulgent TuesdayTasty Tuesday, Tempt my Tummy Tuesday, Tuesdays at the Table, Real Food Wednesday, Works for Me Wednesday, What’s Cooking Wednesday, What’s on the Menu WednesdayFull Plate Thursday, It’s a Keeper Thursday,  Frugal Food Thursday, Thrilling Thursday, Simple Lives Thursday, Fight Back Friday, Fun with Food Friday, Friday Firsts, Friday Potluck, Friday Favorites, Saturday Swap, Monday Mania, Homemaker Monday & Mouthwatering Monday.

* A “share” or “Facebook Recommend” below is always appreciated! Share the recipe among friends…THANKS!!

35 Comments

Easiest romantic dessert EVER…flourless chocolate cake!!

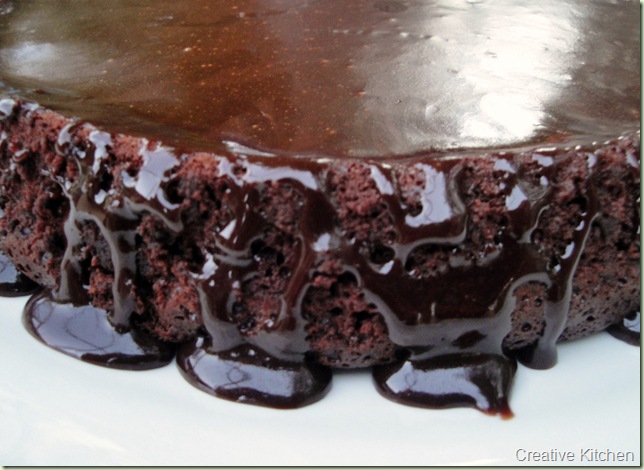
Chocolate Cake

A few weeks ago I discovered something monumental in the life of a chocolate lover….something that could be a huge downfall, as well as a blessing….just how easy it is to make flourless chocolate cake. Not only was it easy, it requires very few ingredients, and most of them you’d likely have at home. I’m a day late getting a post up this week, and actually I had wanted to post this recipe over the weekend. Unfortunately, I got taken out last week by the flu. An illness hasn’t hit me like this in YEARS….since my oldest was a baby. I slept all of Thursday and Friday away, and have been very weak since.

One cool thing to come of this…aside from how helpful my oldest daughter was (she took care of her two sisters while I slept this off)….was that I rediscovered the Food Network. Saturday my hubby took all 3 girls out for the day so I could get some rest (such a sweetie!), and I spent the day watching the Food Network. I don’t normally watch a lot of television, but I must say it was immensely pleasurable watching all of the chopping, slicing, cooking….hearing food chatter, seeing fresh ingredients, and being introduced to shows I’ve either never seen or only seen once or twice before.

I’ve always been a fan of Ina Garten and Paula Deen, but some new favorites now include Down Home with the Neelys and Cooking for Real. I’m always up for a throwdown with Bobby Flay, but was really intrigued by Worst Cooks in America. And how cool is Restaurant Impossible? Trying to save a failing restaurant in only 2 days with $10,000. I was craving a return to normalcy, which meant a return to cooking in my kitchen, but my energy level was not there. I found the Food Network to be a source of comfort and companionship. And I’m sure I learned a thing or two….I always do.

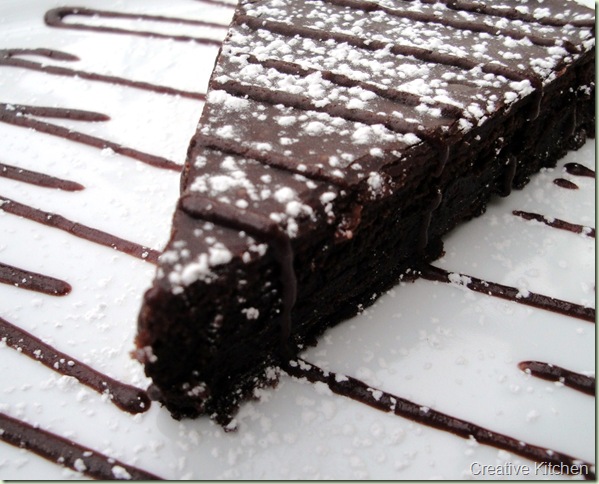
Slice Chocolate cake

Flourless Chocolate Cake (Epicurious.com)

4 ounces fine-quality bittersweet chocolate (I used special dark chocolate bars chopped)
1 stick unsalted butter (I used salted)
3/4 cup organic cane sugar
3 large eggs, organic cage-free
1/2 cup unsweetened cocoa powder

  1. Preheat oven to 375 degrees. Butter an 8 inch round cake pan, line pan with wax paper and butter wax paper.
  2. Melt chocolate and butter in a small metal bowl placed over a saucepan with boiling water. Turn burner down when water starts boiling, but keep at a simmer. Stir until you have a smooth mixture. Remove from heat and stir in sugar. When well combined, add in eggs. Stir until smooth, then add cocoa powder. Stir until just mixed.
  3. Pour into pan and bake for 25 minutes. Cool in pan on rack for 5 minutes, and then invert onto cake plate or serving platter.

This cake tastes perfect as is. Moist chocolate heaven! There was no frosting or icing listed with the recipe. I looked around online till I found a simple chocolate ganache type icing. It would also be incredible with a raspberry sauce. Whatever your heart desires.

Mother’s Chocolate Icing (Cooks.com)

1/4 cup butter
1/4 cup cocoa powder
1/4 cup whole milk
1 cup sugar
1 tsp vanilla

  1. Melt butter. Add in cocoa powder, milk and sugar. Bring to a boil over medium heat, and cook 1 minute stirring constantly. Add in vanilla, and continue stirring over heat for another couple minutes.
  2. This recipe was extremely easy to make, and very tasty. It made A LOT of icing. After I made it, I poured it right over the cake. I stored the leftover icing in a squeeze bottle in the fridge.

Did I mention how AWESOME this cake was? It was a hit with everyone in the family, and one that we will make again and again. My imagination starts to run wild with all the possibilities…I would love to top this cake with fresh raspberries come summer. That would push this over the edge!! Be sure to check out these flourless brownie chocolate cookies.

Do you like watching the Food Network? If so, what are your favorites shows or personalities?

If you enjoyed this post, won’t you consider sharing it with others? Handy share and “Facebook recommend” buttons are below. It really makes my day when you pass things along! To make sure you don’t miss a post or recipe you can either follow Creative Kitchen on Facebook or subscribe by Email in the sidebar. Thanks for reading….I love having company in the kitchen!

*This recipe is linked up with Works for Me Wednesday, Real Food Wednesday, Thrilling Thursdays, Frugal Food Thursday, Simple Lives Thursday, Fun with Food Friday, Friday Favorites, Family Friendly Friday, Friday Potluck & Your Recipe, My Kitchen

Related Posts Plugin for WordPress, Blogger...
22 Comments